Automatic reminders send notifications to clients around an invoice's due date, before it is overdue and after. You configure the schedule once and Rebill handles the follow-up for you.
Setting up reminders
- 1
Go to Settings > Automation
Click Automation under Settings in the sidebar, then click Invoice reminders in the section rail.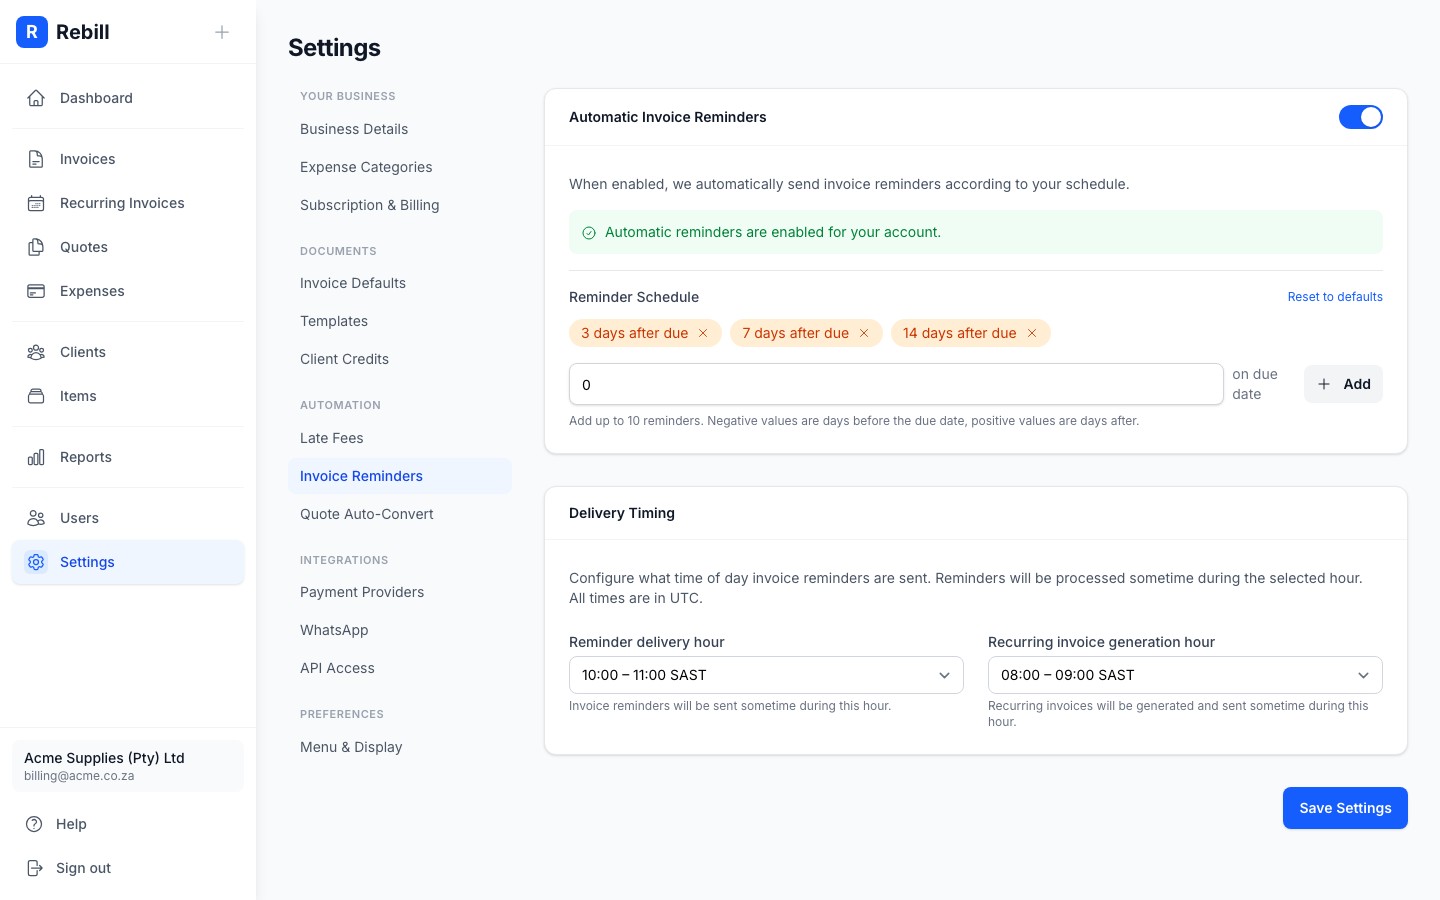
- 2
Enable automatic reminders
Toggle on the switch in the header of the Automatic invoice reminders card. This activates the reminder schedule for all sent, unpaid invoices. - 3
Configure the schedule
The default reminder schedule sends emails 5 days before the due date, on the due date, and 3, 7, 14, 30, 60, and 90 days after it. You can customise this, up to 10 reminders total:- Enter a number of days and click "Add". Negative numbers are before the due date, positive numbers are after, and 0 is on the due date.
- Click the × on a reminder chip to remove it.
- Click "Reset to defaults" to go back to the default schedule.
- 4
Send reminders via WhatsApp too (optional)
In the separate WhatsApp delivery card, toggle on sending reminders via WhatsApp as well as email. Each WhatsApp reminder uses one credit; clients without an email address still receive WhatsApp reminders. This only takes effect once automatic reminders are enabled above. - 5
Save your changes
A save bar appears at the bottom of the page once you change something. Click Save, or press Cmd+S (Ctrl+S on Windows).
Combining reminders with late fees
Reminders and late fees work well together. Set up reminders to notify clients, and late fees to incentivise timely payment. See Charging automatic late fees for more.Note
Reminders are only sent for invoices with a status of sent. Draft, paid, and cancelled invoices are not affected. The hour of day reminders go out is set separately, in Settings > Automation > Timing; see Setting your business timezone and fiscal year.