If you've enabled automatic late fees in Settings, Rebill adds a fee line item to an overdue invoice once its grace period passes. You can remove that fee from an individual invoice at any time, for example to give a client a one-off exception.
- 1
Open the overdue invoice
Go to Invoices and open the invoice that has a late fee applied. You'll see the late fee listed as its own line item on the invoice document. - 2
Open More actions → Waive late fee
Click the More actions menu (the ⋯ button top right). If the invoice has a late fee line item, a Waive late fee option appears near the bottom of the menu.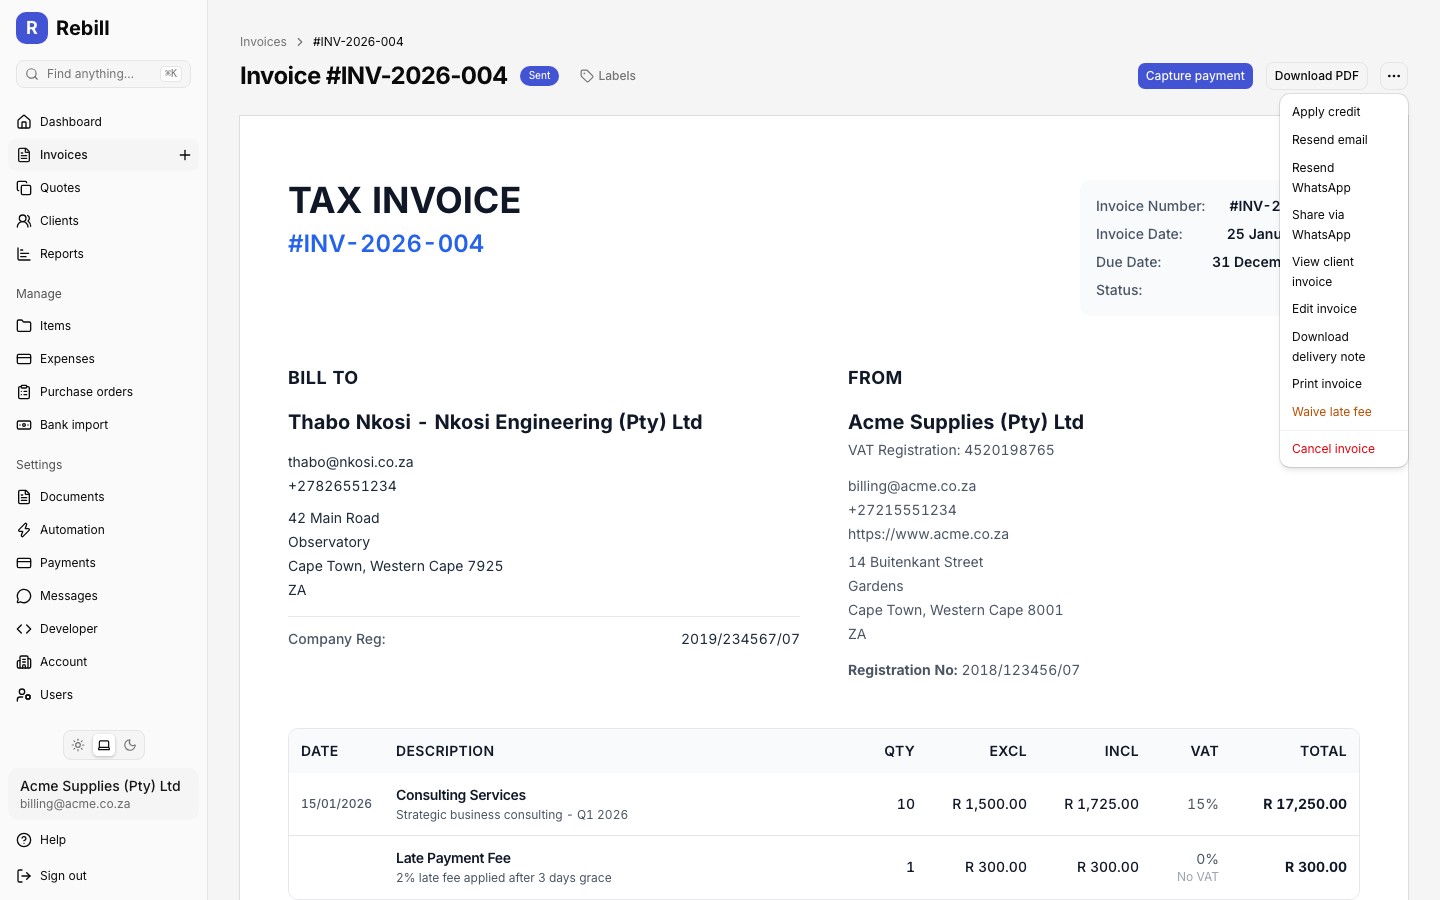
- 3
Confirm removal
A confirmation dialog explains that this removes all late fee charges from the invoice and reduces the outstanding balance. Click "Remove late fee" to confirm.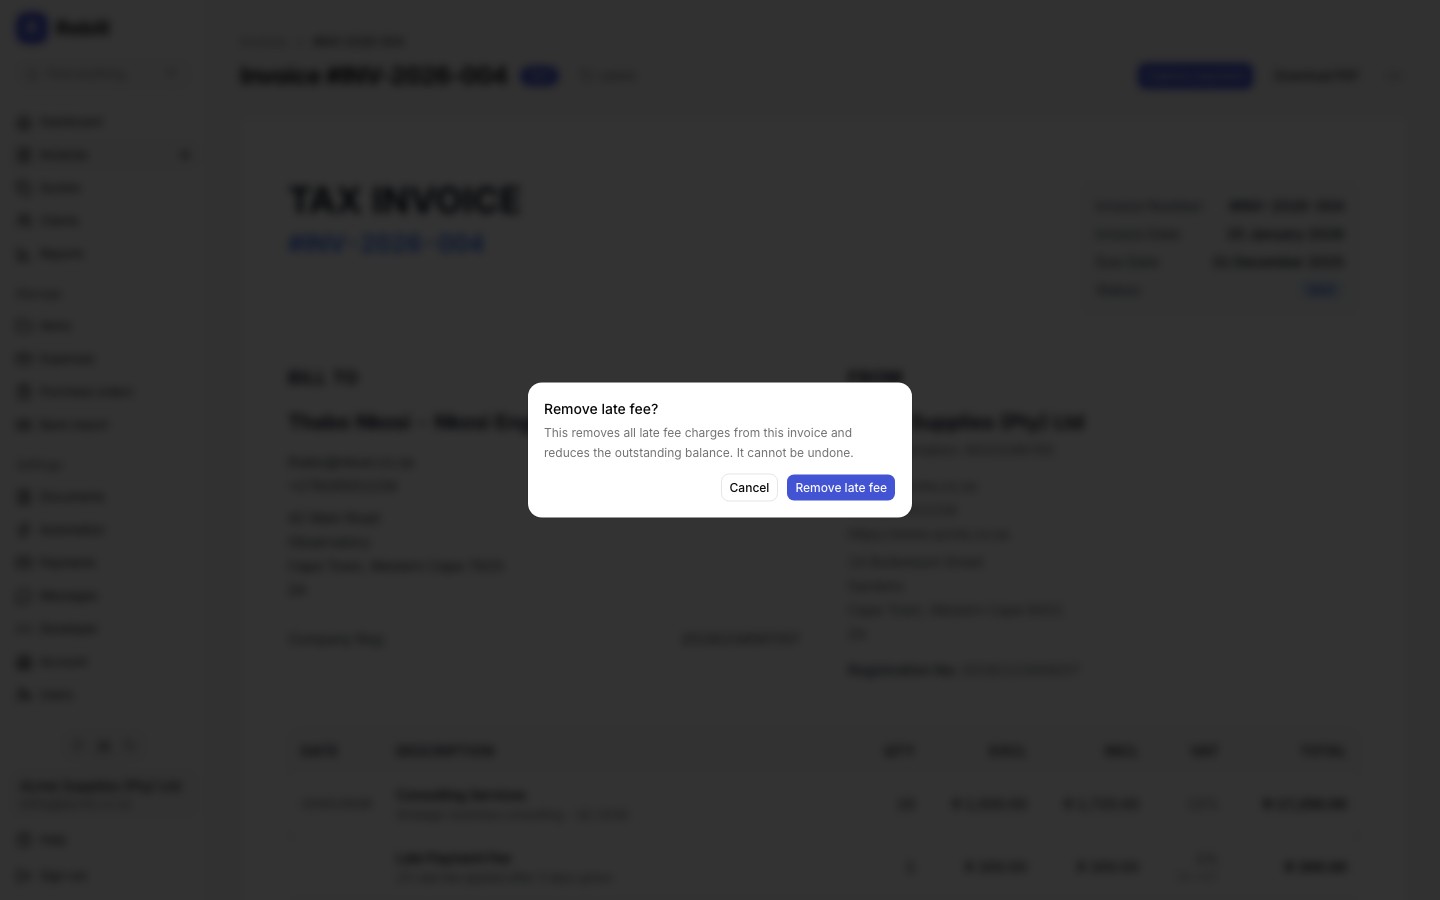
Important
Waiving a late fee cannot be undone. If the invoice becomes overdue again and the grace period passes, Rebill applies a new late fee as normal, unless you've disabled late fees for that invoice.Tip
To stop late fees before they're ever applied, disable them for that invoice in the invoice form's More options section, or turn off automatic late fees entirely in Settings.