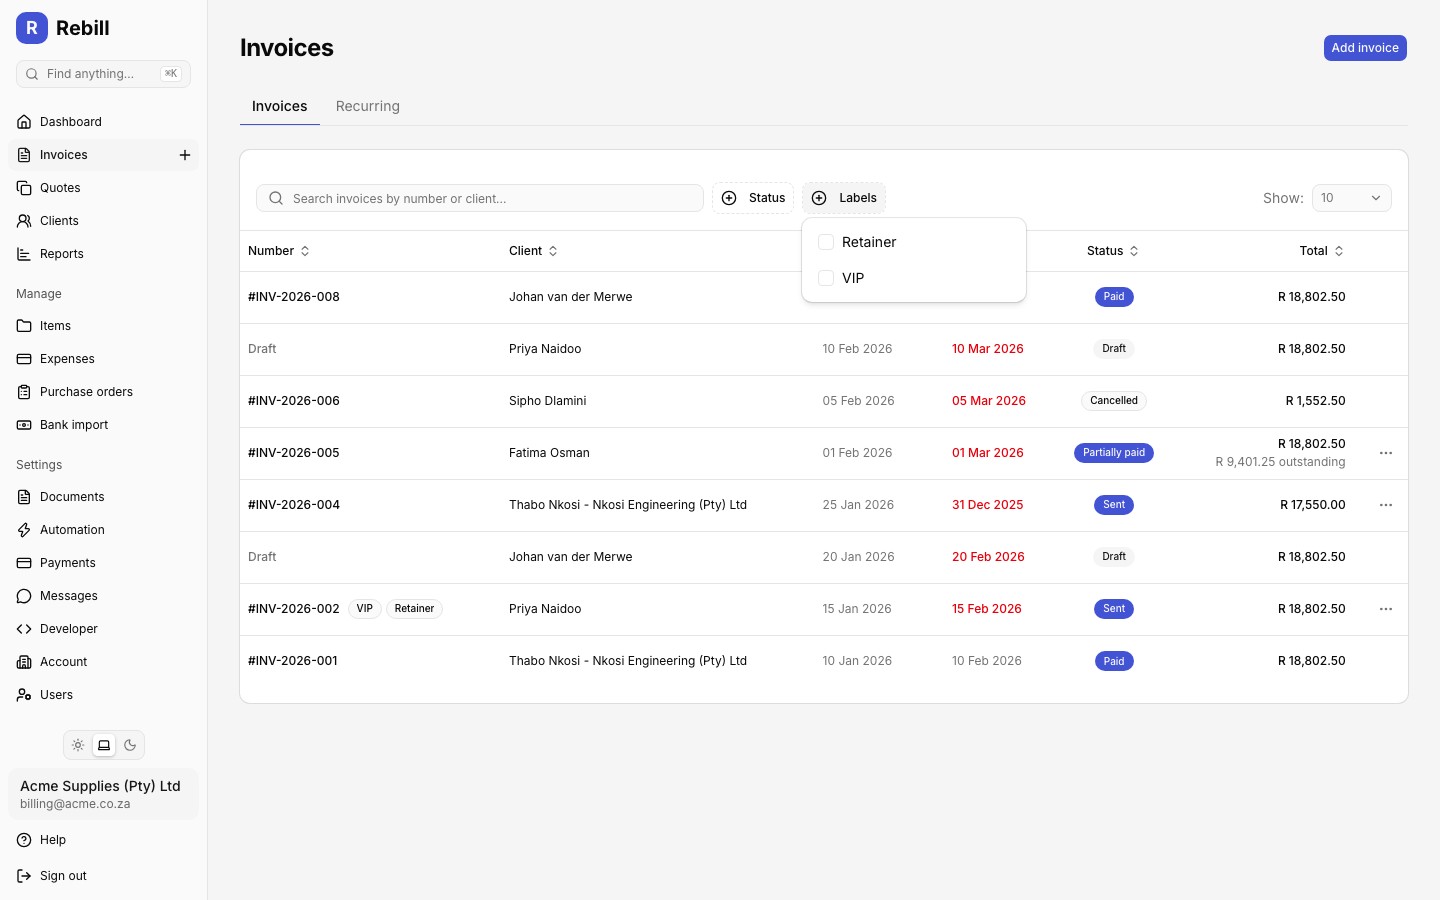
Labels are internal tags you can add to any invoice to organize your list by project, client type, urgency, or anything else that matters to your business. Clients never see labels.
Assigning labels
- 1
Open the Labels editor
On any invoice, click the Labels button next to the status badge at the top of the page. If the invoice already has labels, click the tag icon instead.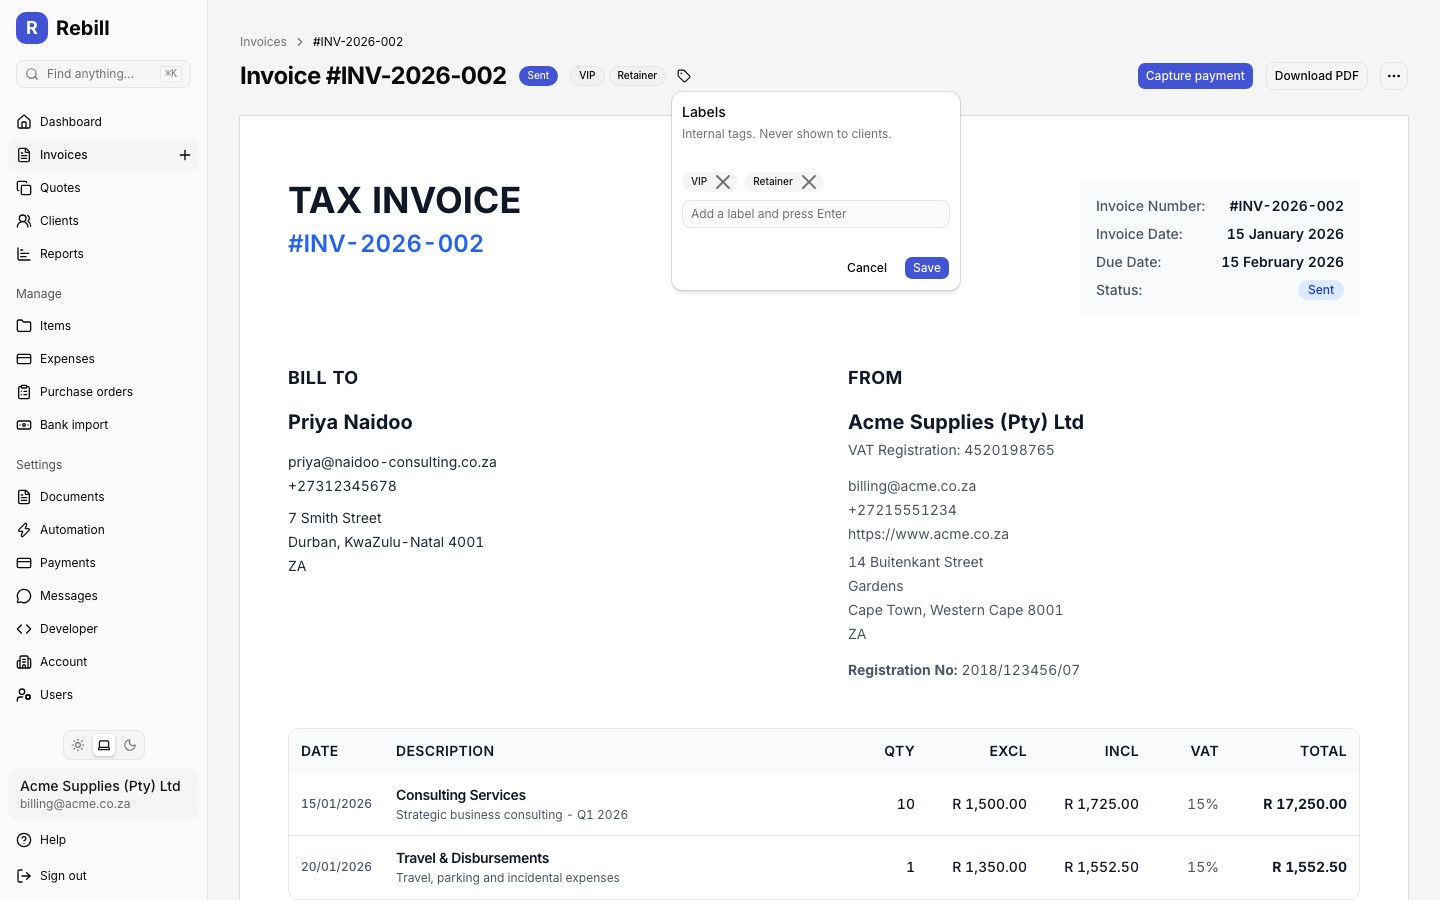
- 2
Add or remove labels
Type a label and press Enter to add it, or pick one of your existing labels from the suggestions. Click the × on a label chip to remove it. - 3
Save
Click "Save" to apply your changes. The invoice updates immediately without leaving the page.
Tip
You can also add labels while creating an invoice: expand More options on the invoice form and use the Labels section there.Filtering by label
Once at least one of your invoices has a label, a Labels filter appears above your invoice list alongside the Status filter. Click it and tick one or more labels to show only matching invoices. Searching also matches label names.